
Step-by-step method
Alcohol marker tutorial: four easy coloring steps
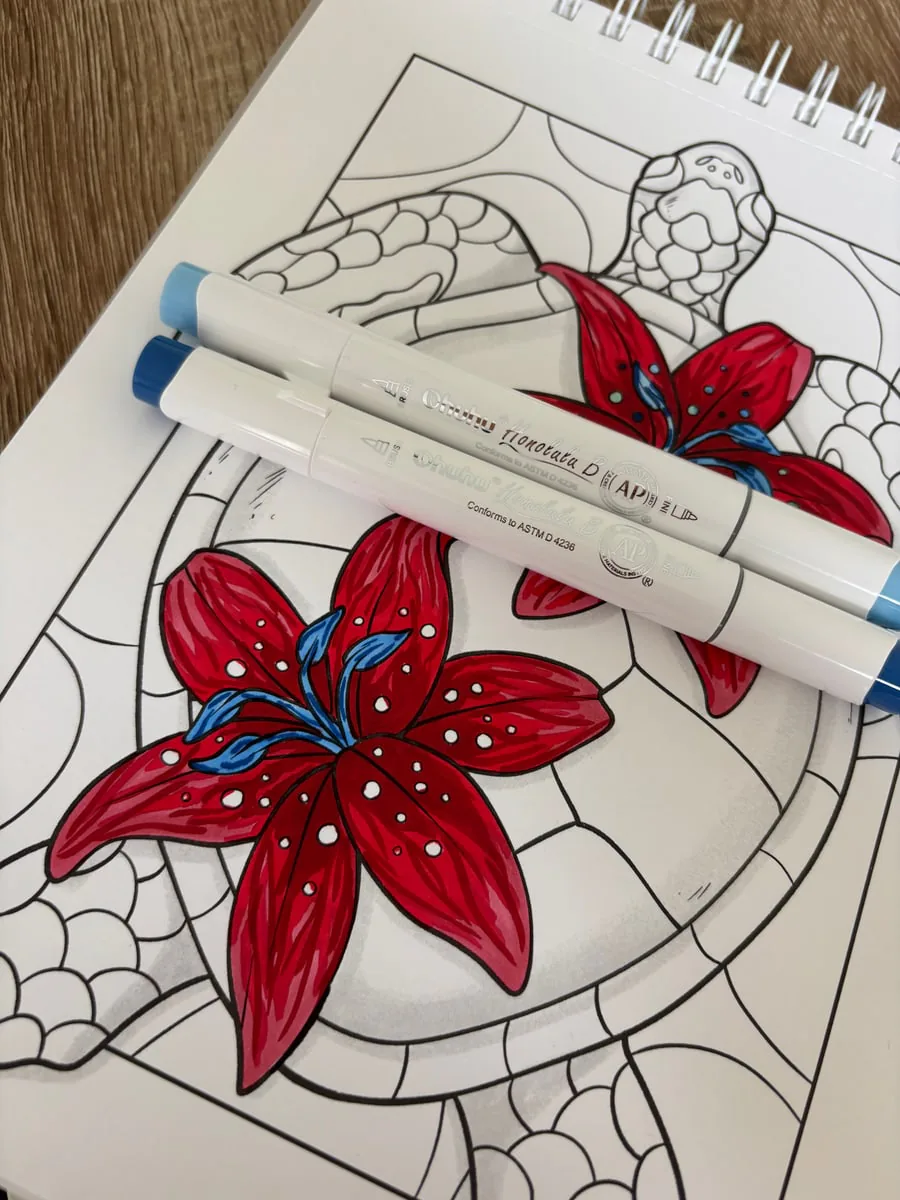
This simple method covers a light base, layered colors, shadows and finishing details. The flower colored with the Ohuhu x Jade Summer set is the practical example, without requiring exact marker codes.
In this flower tutorial
The quick method
To color a flower with alcohol markers, begin with a light base. Add the main red while keeping part of that first shade visible, then draw a few darker strokes from the center and folds of each petal. Finish with small contrasting details.
The exact marker numbers are not essential. Choose three coordinated values for the petals, followed by two blues and a light gray for the finishing details.
The finished result
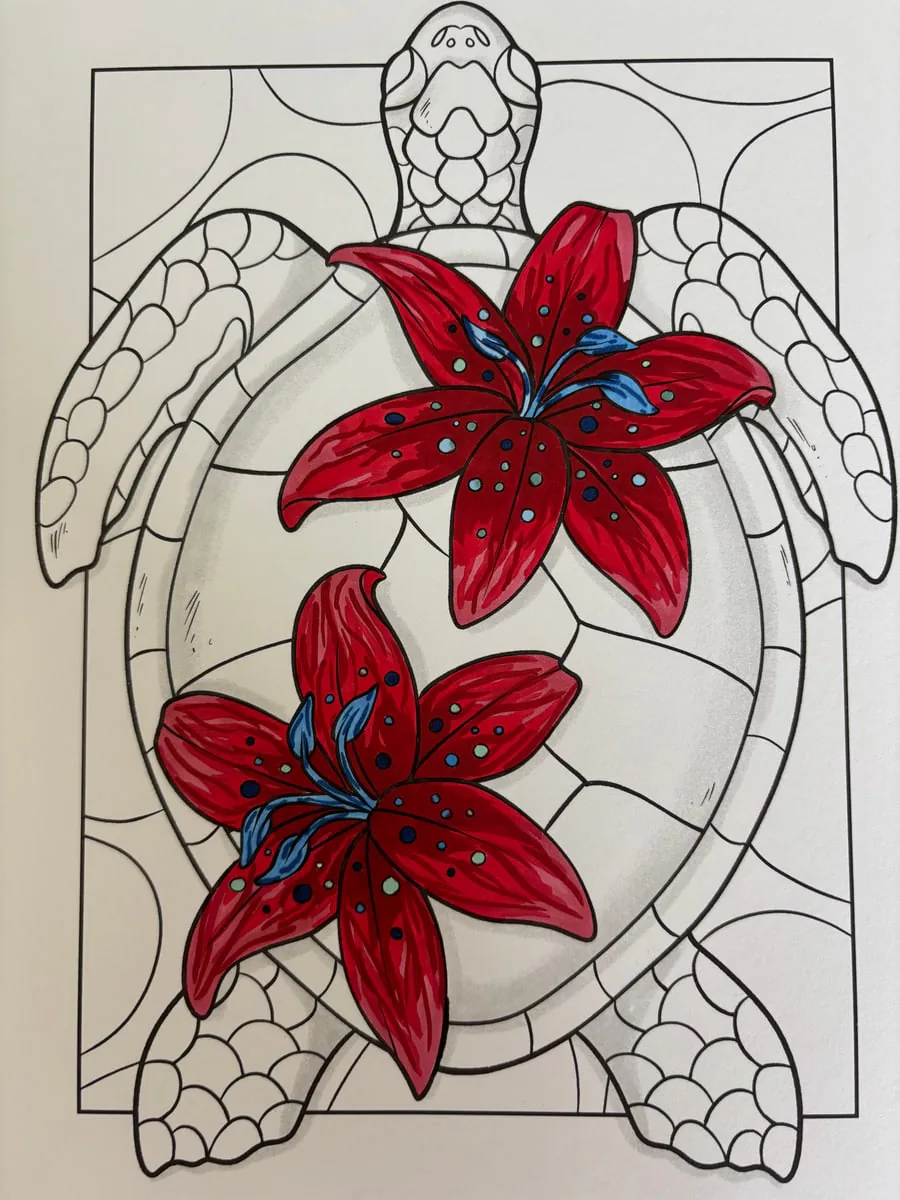
The petals remain readable because the light pink is kept near the edges, the main red covers the middle and darker strokes are used sparingly. Blue centers and dots provide clear contrast, while light gray shadows separate the flowers from the shell.
The marker set and palette used
This coloring page was made with the Ohuhu x Jade Summer set. It includes 47 colors and one colorless blender, Honolulu B markers with brush and fine tips, and a Jade Summer coloring book.
- A light pink for the base and the brighter areas.
- A medium red for the main color of the petals.
- A darker red for folds, veins and the flower center.
- A light blue and a deeper blue for the centers and small dots.
- A light gray for suggesting shadows around the flowers without coloring the entire turtle.
You do not need the same marker numbers: choose colors that fill these roles in the set. The tutorial depends on the order of the values, not on one combination that is difficult to reproduce.
Color the flower in four steps
1. Apply the first pink layer
Start with the lower flower and apply light pink from the outside of the petals toward the center. Leave a few irregular white shapes and the small circles uncolored: they will become highlights and details. The finished flower above provides a visual reference.
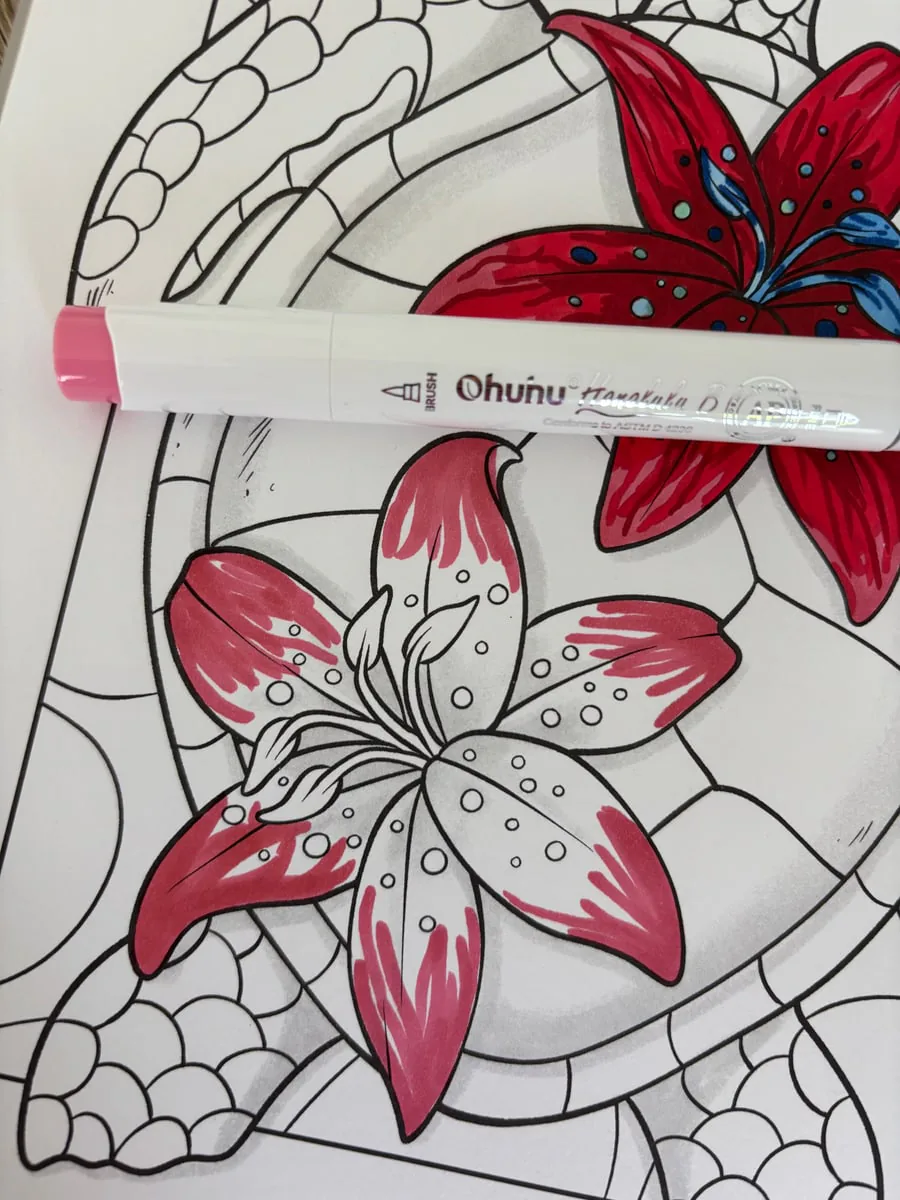
2. Add red without covering all the pink
Place the main red in the center of the petals and along selected curves. Keep pink visible near the edges and in a few long strokes. This difference in value already creates depth without requiring a perfectly smooth blend.
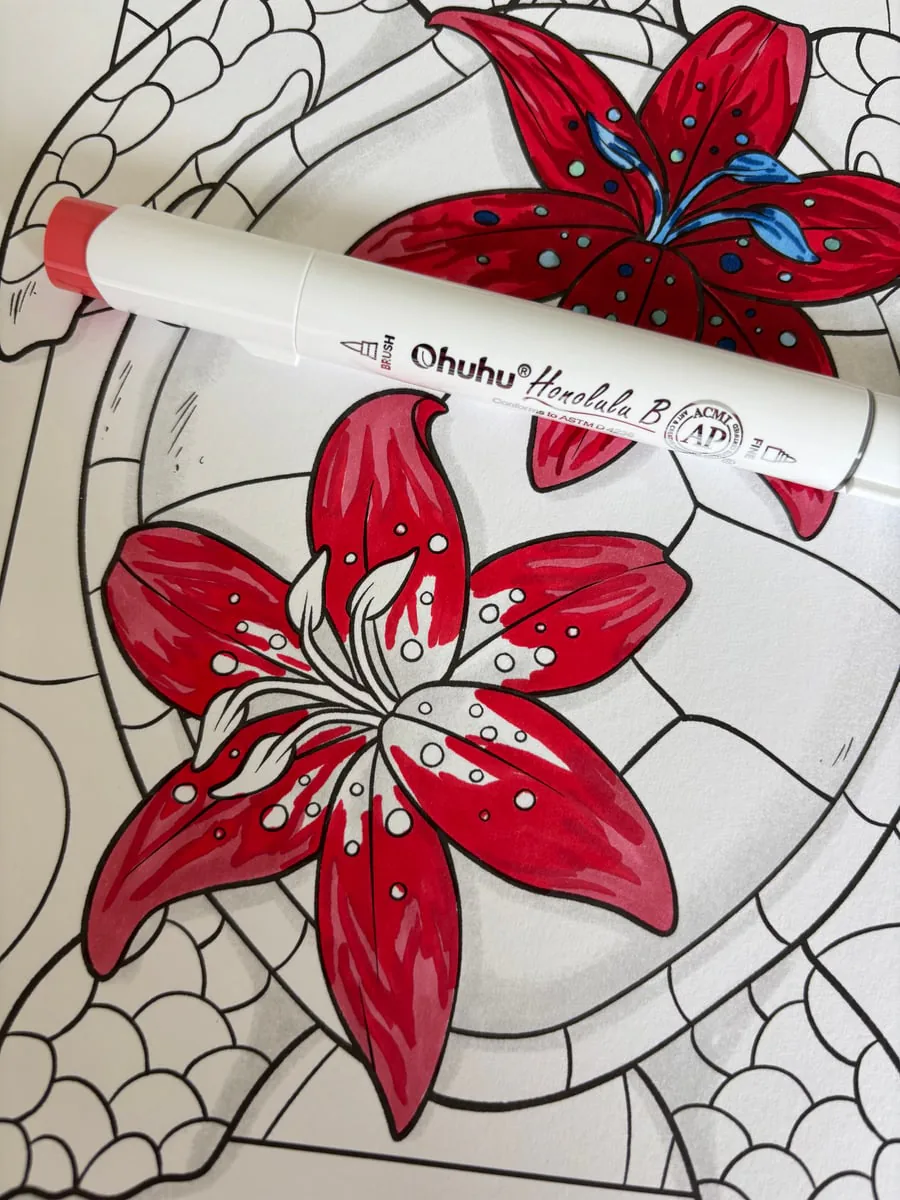
3. Deepen the shadows and petal veins
With the darkest red, draw short marks from the center of the flower in the direction of each petal. Concentrate shadows near folds and the base. Do not cover every area evenly: both the pink and the main red should remain visible.
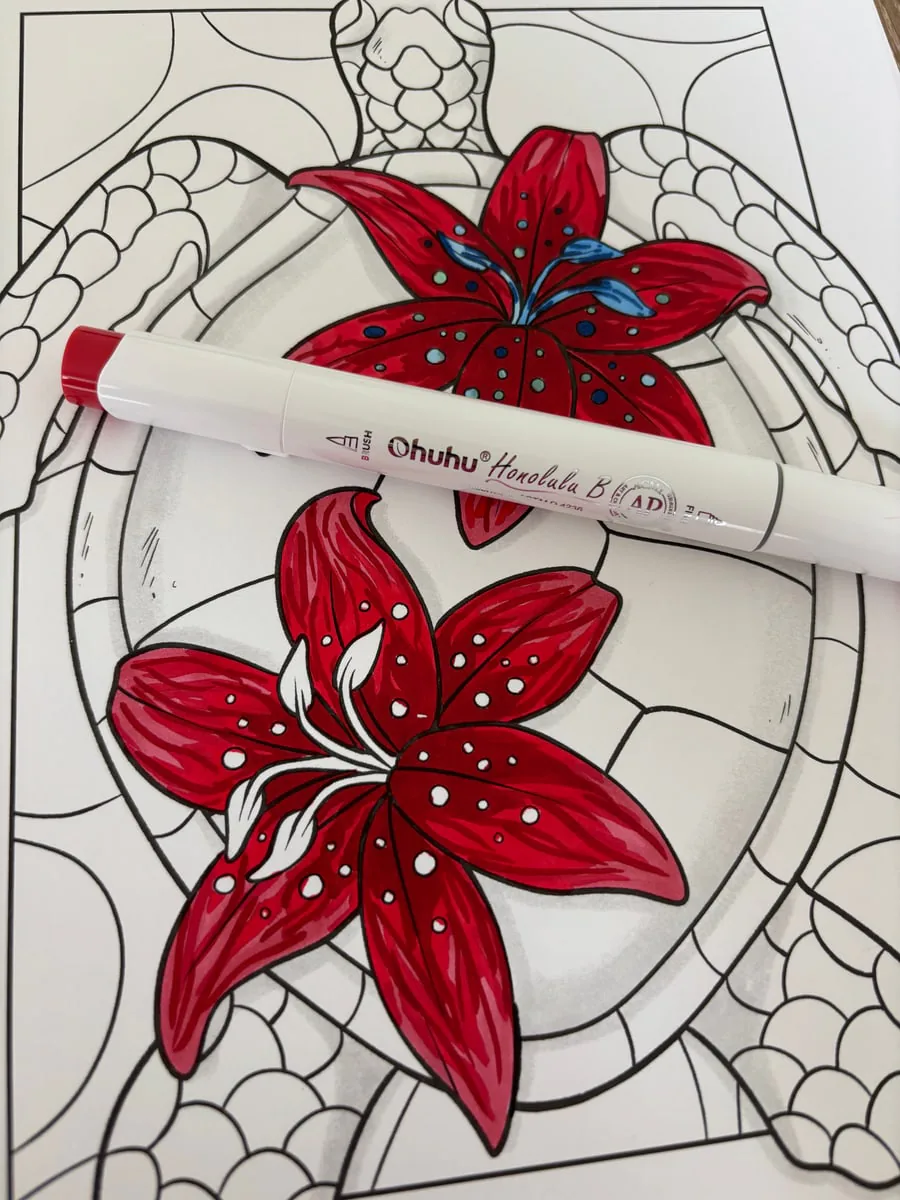
4. Finish with blue details, dots and gray shadows
Color the center with light blue, then add a deeper blue to one side for dimension. Distribute a few blue and very light dots over the petals. Finish with a soft gray shadow around the flowers to separate them from the background.
Watch the unboxing and coloring process
The TikTok video shows the Ohuhu x Jade Summer set being opened, followed by the flower coloring process. It complements the photos by showing the hand movements, layer order and transition from the red shades to the blue details.
Details that make the result look cleaner
- Place a spare sheet or protective mat underneath the page before using alcohol markers.
- Test each color on separate paper and check it once dry before adding it to the flower.
- Work one petal at a time to keep the strokes moving in the same direction and control the layers.
- Decide which areas will stay light before the first layer, because it is difficult to recover white paper after applying an alcohol marker.
- Use the brush tip for the petals and the fine tip for dots, small shapes and narrow areas near the outlines.
If your filled areas look uneven, read the guide on avoiding streaks with alcohol markers. For placing darker areas, the simple shadows method is an easy technique to reuse.
Key takeaways
- Three pink and red values are enough to give the petals depth.
- The role of each color matters more than its exact marker code.
- A blue accent and soft gray shadow make the red flowers easier to read without coloring the whole background.
FAQ
Do I need the exact same markers to follow this tutorial?
No. Choose a light pink, a medium red, a darker red, two blues and a light gray from this set or another palette.
Which marker tip should I use for the petals?
The brush tip follows the shape of the petals well. The fine tip is useful for small dots and narrow areas.
How do you add depth to a flower with alcohol markers?
Keep a lighter shade near the edges, place the main red in the middle and add a few darker strokes from the center of the flower.
Should I protect the page underneath when using alcohol markers?
Yes. A protective sheet or the mat supplied with the set keeps ink from bleeding onto the next illustration.